Sunday, May 29, 2011

EARRINGS!!!!!

Haha I have been BEGGING my mom to take me to Michael's to get supplies for some earrings I've been wanting to make. Yesterday I finally got to go and i made them right away:) I took pics of each step so that I could post it as a DIY for my blog!!!

You will need:
Embroidery thread(as many or as little colors as you like)
Assorted chain
Rhinestone chain
earring hooks
wire cutters
two jumprings

First, lay out your chain and cut them to whatever lengths you like. 


Next, thread the chain onto a jumpring


Next, take your embroidery thread and wind it around the chain as much as you like. 


Attach an earring hook and VOILA!!!!


:) 

*Please credit Made With Love when using this DIY*

Saturday, May 28, 2011

TAG you're it!

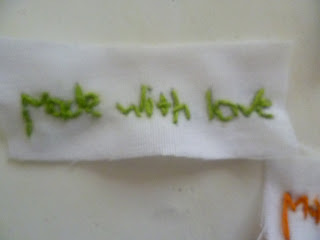
On my last post, I branded my DIY book clutch with a "Name tag" :) I liked the idea and decided to make more to sew onto my larger DIYS... I cut out white rectangles and embroidered each one with "Made With Love." Im not a pro, but I like them so far.... 


Hope you like them:) 

Subscribe!!!!!!!!!!!!!!!!(its not an option)

Book Clutch

Hey everyone:) I am SOOO mad at myself!!!!!!!!! I misplaced my camera, and was unable to document my newest DIY step-by step!:(

I have a  few pictures, of the early steps, and i have a few (hopefully) helpful links so I think everything will turn out all right.

Well my DIY is actually a book clutch, inspired by Olympia Le-Tan's Book Minaudiere collection. You may recognize them... Natalie Portman carried one to the premier of "Black Swan."

This DIY is relatively simple, but it is tedious and time consuming.

You will need:
A hardcover book(big enough for a clutch, pretty enough so that you will use it)
Mod podge
Paintbrushes
X-Acto knife
Pencil
ruler
fabric(Something that coordinates with the book...It will be the lining)
Something to use for a latch
A Fan(optional)
Something heavy
Paper
Spacers.... Plastic lids or post-it notes work well

Supplies:


 Step 1: Paint Mod Podge along the sides of all the pages of the book. (DO NOT glue the first blank page, and glue the whole stack to the back cover) 

 Step 2: Place something heavy on the book and so that the pages dry evenly(use some spacers between the front page so that the front page is not glued to the rest of the book) 

 Step 3: use a ruler, and mark a quarter of an inch. Then draw a line from each point to the other. (I hope this makes sense:)


 It should end up looking like this. I drew two boxes, the inner box is half and inch in, and the outer box
is a quater of an inch, I used the outer box. 

I wasnt able to get pictures of the next few steps, as i misplaced my camera. (I stopped and had to continue my project the next day) 

The Next step is to hollow out your book by cutting along the lines you drew with an x-acto knife. Do this page-by-page until the whole book is hollowed out. 

After hollowing out the book, Glue the inside edges with Mod Podge. Then cut fabric to your liking and Mod Podge it to the inside. (line it)

Put a few layers of Mod Podge on the whole thing, just to ensure it is secure. 

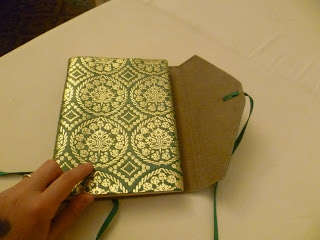
Finished project: 


Haha I embroidered a piece of white fabric to say "made with love"


Hope you liked it... subscribe and comment!

*Please credit Made With Love when using this DIY* 

Tuesday, May 24, 2011

Wrapped Bangles


I am going to make these as soon as i can get my hands on some plain plastic bangles.... :) 


Thanks:) Subscribe!!!!!!

Sunday, May 22, 2011

Leather Journal

Who wouldn't love this absolutely adorable anthropologie journal?? Its so fun and poetic and i LOVE it!!!!!!!!! Im going to write tons of stories.... Or just one long story... in it!!!!: 


Subscribe:) 

Friday, May 20, 2011

Safety Pin Bracelet:)

i have been dying to make this safety pin bracelet! We went to wal-mart today and i just had to get safety pins to make this. Im sorry i havent posted in a few days, but today i am going to try and show you how to make a safety pin bracelet. It is really easy, and call for approx 80-100 safety pins, and elastic thread.

Start By cutting a strip of elastic that can go around your wrist two times. 


Tie a knot in the elastic leaving a one-twp inch tail

Then start threading the safety pin onto the elastic. Thread the elastic through the small hole in the top of the pin


Continue threading the safety pins until the whole thing can fit around your wrist


Next, cut another piece of elastic about the same size as the first


Thread the second piece through the bottom loop of each safety pin


Continue until every pin is threaded. 


Next, tie each end of the top and bottoms strings together.(The bracelet below is for my four-year-old sister, so your should be bigger)


And you are done! enjoy:)


OH and a special thanks to Dana for this Adorable Jean jacket she gave me today!!!!!!! Love it:) 


Hope you liked it!! Please subscribe....

*Please Credit made with love when using this DIY*


Friday, May 13, 2011

Scarf-folding

My new obsession: Sarongs and silk scarves. There are so many awesome ways to fold them, and I'm starting a new series where I will show you how to fold them into different things. Today.: Bags. I will show you how to make 3 easy bags from silk scarves or sarongs. These work best if you have a square, but rectangles work to.

Start by laying your fabric flat on the ground.
 then fold two opposite corners in so they meet at the center.
tie those two corners in a knot.


then grab the two remaining corners and pull them up. Then tie them in a knot. 


Voila!


The next one requires the same steps, but instead of using just the top corners, pull both tied corners and use them as straps.


For the next bag, lay out your fabric with the right side facing down. 


Tie each corner of the sarong in a knot. 


Next tie the tails of each corner together


Join the two loops for straps, and.... Voila:) 


Hope you liked this:) Will post more soon!!!!!!!!!!!!! Subscribe!